 how-to
How to Maintain Rubber Roofing: A 2026 Guide
Table of Contents
- Why Maintaining Your Rubber Roof Matters
- How to Maintain Rubber Roofing: The Complete Cleaning Process
- Using an EPDM Roof Repair Kit for Minor Damage
- How Long Does EPDM Roofing Last?
- Your Flat Roof Inspection Checklist
- Chemical Compatibility and What to Avoid
- Seasonal Schedule and When to Call a Professional
- Frequently Asked Questions
Last Updated: September 5, 2026
Rubber roofing is one of the most durable flat roofing systems available, but its longevity depends heavily on how you care for the membrane over time. Learning how to maintain rubber roofing properly is the difference between a roof that lasts decades and one that fails prematurely. In this guide from ARRC Ltd, a specialist in EPDM rubber roofing with over 30 years of experience, we break down the full maintenance process, from routine cleaning to spotting damage early.
Many homeowners only think about their flat roof when a leak appears, which is exactly the wrong time. The most effective maintenance is preventative, and it requires just a few hours of work each year. Below, we show you exactly how to protect your investment, what tools you need, and when repairs are best left to a professional installer.
Why Maintaining Your Rubber Roof Matters
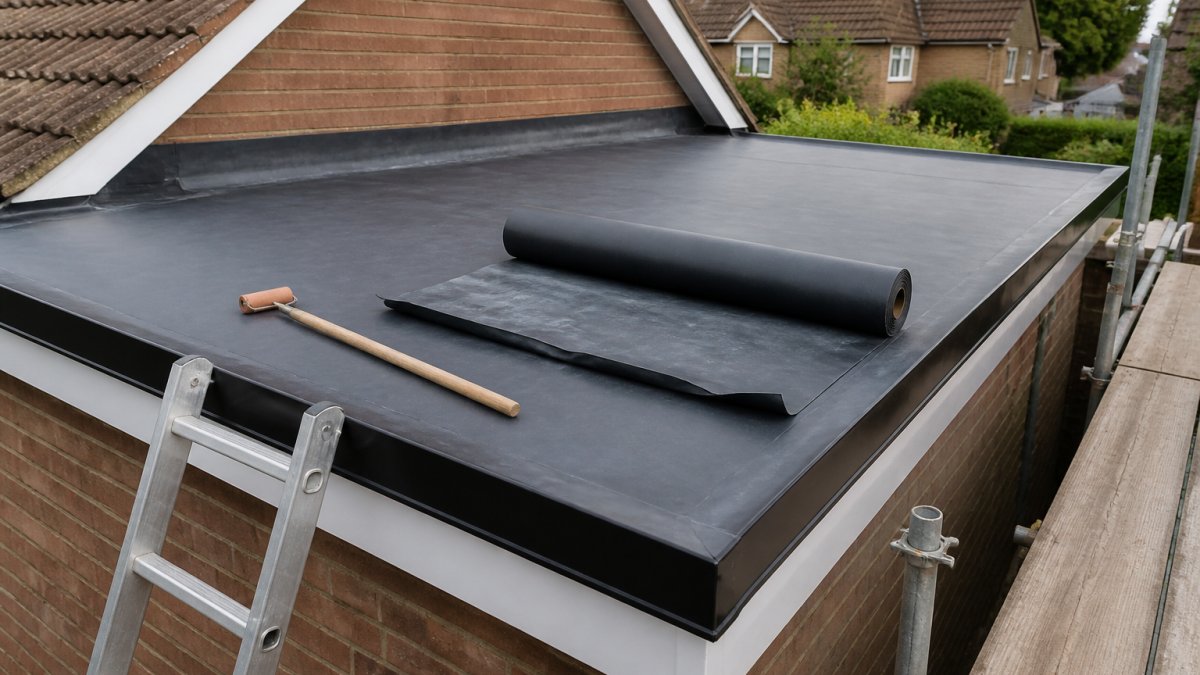
A rubber roof membrane is a single, continuous sheet that protects your property from the elements. When maintained correctly, EPDM rubber roofing resists UV degradation and weathering for decades. However, neglect allows debris to trap moisture, which accelerates wear at the membrane surface and around seams.
The main threats to a rubber roof are simple: standing water, organic growth, and physical damage. Leaves and dirt break down into acidic compounds that eat into the membrane. Moss and algae hold moisture against the surface, which promotes degradation during freeze-thaw cycles. Preventative checks catch these issues while they are cosmetic rather than structural.
How to Maintain Rubber Roofing: The Complete Cleaning Process
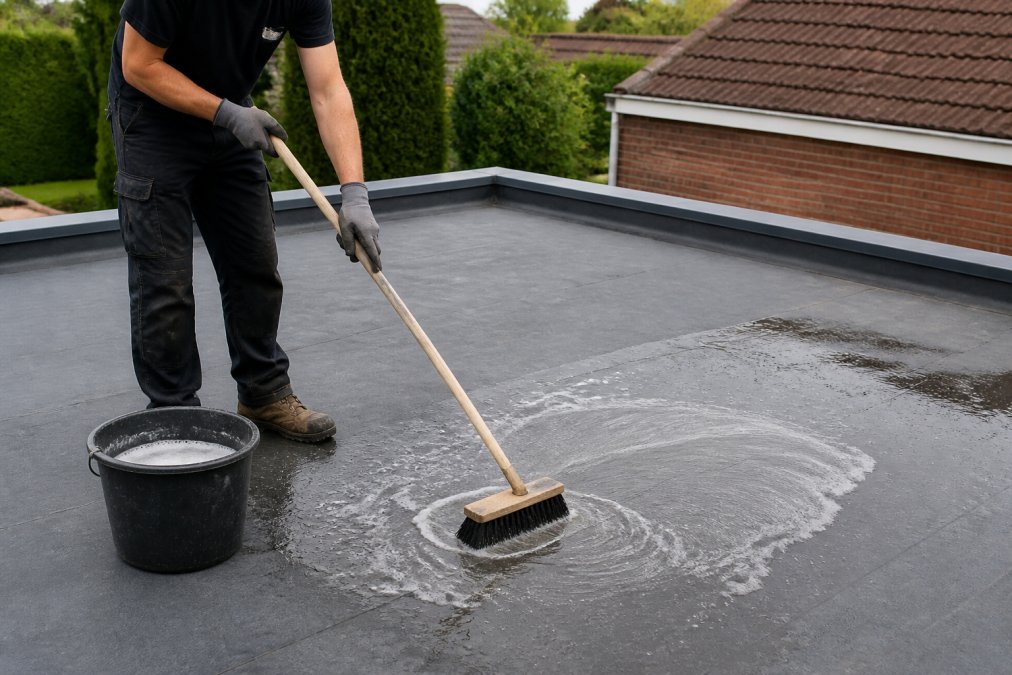
Cleaning is the core of any maintenance routine, and it is a job most homeowners can do themselves with the right equipment. The process involves four distinct steps, and rushing any of them reduces the effectiveness of the whole job. You will need a soft-bristle brush, a mild detergent such as washing-up liquid, a bucket of clean water, and a hose for rinsing.
Step 1: Clear Debris and Leaves
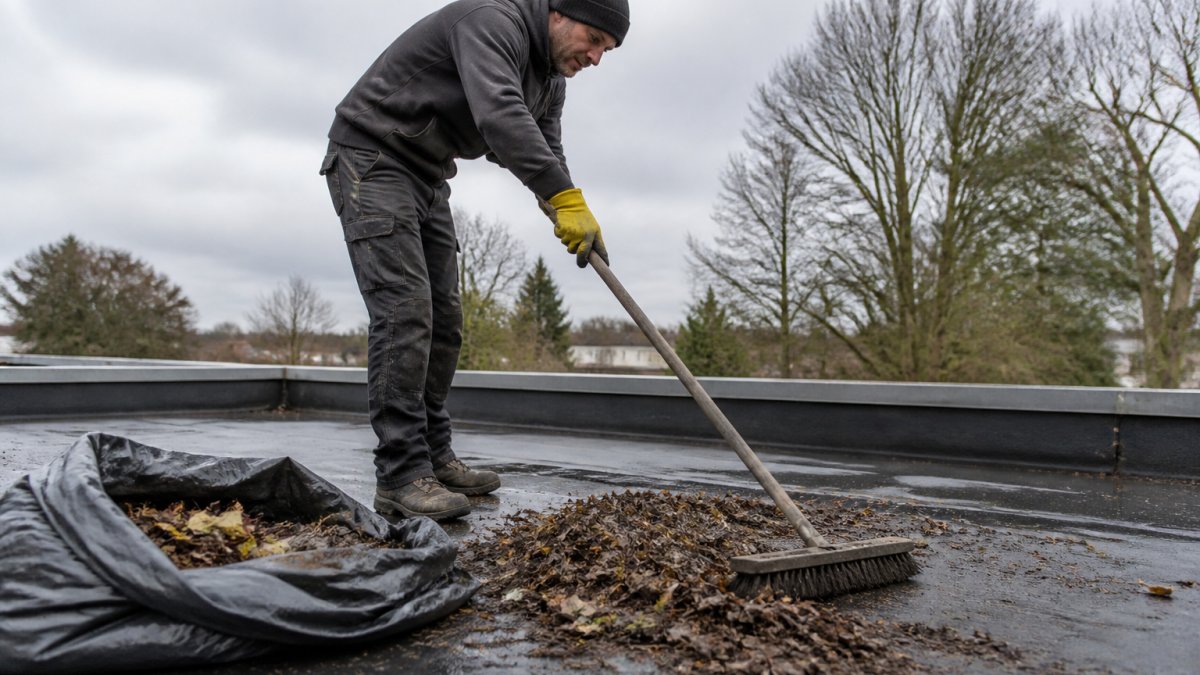
Before any liquid touches the roof, remove all loose material by hand or with a soft broom. Leaves, twigs, and grit act as an abrasive layer that scratches the membrane when you brush it. Pay particular attention to corners, around roof outlets, and along the edges where debris accumulates naturally.
Work methodically across the whole surface, then check the gutters and drainage points. A blocked outlet will cause water to back up onto the roof, so clearing debris from the drainage path is just as important as cleaning the membrane itself. This step prevents the scrubbing stage from grinding dirt into the rubber.
Step 2: Wash the Surface with Mild Detergent
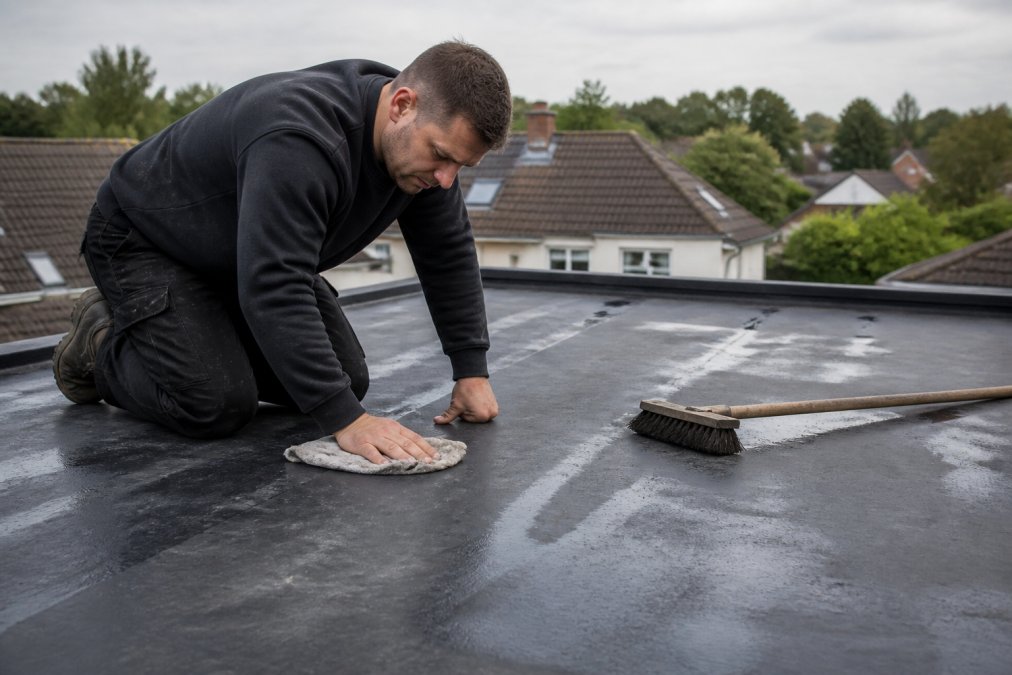
Once the roof is clear, mix a small amount of mild detergent with warm water in your bucket. Washing-up liquid is ideal because it cuts through surface grime without damaging the membrane. Dip your soft-bristle brush into the solution and scrub the roof in overlapping sections, working from the highest point down.
Do not use a wire brush or any abrasive pad, as these will scratch the EPDM and create weak points. Keep the roof surface wet as you work so the dirt lifts rather than dragging. For stubborn stains, let the solution sit for a few minutes before scrubbing again.
Step 3: Treat Algae and Moss
Algae and moss need a targeted treatment rather than just soapy water. A dedicated roof cleaner or a diluted bleach solution will kill organic growth, but check the label for compatibility with EPDM first. Apply the treatment to the affected areas and allow it to work for the time stated on the product instructions.
Do not scrape moss off with a metal tool, as this will cut the membrane. Once the growth has died, it will brush away easily with your soft-bristle brush. This step is essential for roofs shaded by trees, where moss and algae thrive in damp conditions.
Step 4: Rinse Thoroughly
Rinsing is the step most people rush, but it matters more than you might think. Residual detergent and cleaning solution left on the roof can break down the membrane over time. Use a hose to rinse the entire surface thoroughly, starting at the highest point and working down so the dirty water flows away from the roof.
Check that all cleaning solution has been washed out of the seams and around any roof penetrations. After rinsing, inspect the roof once more for any areas you missed. A clean surface is also the best time to spot small punctures or tears that need attention.
Using an EPDM Roof Repair Kit for Minor Damage
Not all damage requires a full roof replacement. Minor punctures, small tears, and lifted seams can often be repaired at home using an EPDM roof repair kit. These kits typically contain a patch of membrane, a compatible adhesive or primer, and a seam roller.
The repair process is straightforward: clean and dry the damaged area, cut a patch that overlaps the damage by at least 50mm on all sides, apply the adhesive, and press the patch down firmly. Most kits take under an hour to complete, and a proper repair restores the weatherproofing without the cost of a new roof.
How to Patch a Small Tear or Puncture
A tear up to 50mm long or a puncture smaller than a 10p coin is well within DIY scope. Start by cleaning the area with a damp cloth and mild detergent, then dry it thoroughly with a lint-free cloth. Cut a patch from the repair kit membrane that extends at least 50mm beyond the damage on every side, and round the corners of the patch to prevent them from peeling up later.
Apply the EPDM primer to both the patch and the roof surface, and allow it to become tacky according to the manufacturer's instructions, typically two to five minutes. Apply the adhesive to both surfaces, press the patch down firmly, and use a seam roller to work from the centre of the patch outwards. This pushes out air bubbles and ensures full contact. Leave the repair undisturbed for at least 24 hours before the roof sees rain.
How to Reseal a Lifted Seam
Lifted seams are the most common failure point on EPDM roofs, and they are often caused by poor installation or by water getting under the seam during a freeze-thaw cycle. If you catch a seam lifting early, you can reseal it without replacing the whole roof.
Lift the loose edge of the seam gently, clean both surfaces with a solvent wipe from your repair kit, and allow them to dry completely. Apply a thin, even layer of seam primer to both sides, wait for it to flash off, then apply the seam adhesive. Press the seam back down and roll it firmly with a seam roller. For an extra layer of protection, apply a bead of EPDM-compatible sealant along the edge of the resealed seam once the adhesive has cured.
When a Repair Kit Is Not Enough
A repair kit will not help you if the damage is more extensive than a small tear. Large tears longer than 150mm, damage that extends across a seam, areas where the membrane has shrunk or become brittle, or punctures caused by structural movement all require professional assessment. Similarly, if you notice that the membrane has become porous or is showing widespread crazing, a network of fine cracks on the surface, the rubber has reached the end of its serviceable life and patching will only delay the inevitable.
If you are unsure whether a repair is within your skill level, a poor patch job is worse than no repair at all because it hides the underlying issue and allows water to track laterally beneath the membrane. A professional installer can assess the roof, carry out repairs correctly, and advise on whether a replacement is more cost-effective than ongoing patches.
How Long Does EPDM Roofing Last?
The lifespan of an EPDM roof is one of its main selling points, and it is a question we answer frequently. A professionally installed EPDM rubber roof will last 40 to 50 years, far exceeding the lifespan of felt or bitumen alternatives (the EPA). This longevity is why EPDM is the preferred choice for flat roofs on garages, extensions, and commercial units.
The key phrase there is "professionally installed." A roof is only as good as its seams, and poorly bonded seams are the most common cause of premature failure. This is why ARRC Ltd backs every flat rubber roof installation with a 20-year guarantee, giving property owners confidence that the workmanship is protected.
| Roofing Type | Typical Lifespan | Maintenance Level | Best For |
|---|---|---|---|
| EPDM Rubber | 40-50 years | Low | Garages, extensions, commercial units |
| Felt/Bitumen | 10-20 years | High | Short-term budgets |
| PVC Single-Ply | 20-30 years | Medium | Large commercial roofs |
Your Flat Roof Inspection Checklist
A thorough inspection twice a year is the backbone of a good maintenance schedule. Use this flat roof inspection checklist to guide your checks in spring and autumn, and always walk the roof carefully, staying on the reinforced footpaths if the membrane has them.
- Check for ponding water: After rain, look for areas that hold water for more than 24 hours. Standing water accelerates membrane degradation.
- Inspect seams and flashings: Look for lifting, bubbling, or separation along seams and where the roof meets walls or chimneys.
- Clear all drainage points: Ensure outlets, gutters, and downpipes are free of debris and flowing correctly.
- Examine the membrane surface: Look for punctures, tears, or areas where the surface looks worn or faded.
- Check roof penetrations: Inspect the seals around skylights, vents, and pipes for cracks or gaps.
- Trim overhanging branches: Prevent branches from rubbing against the membrane and dropping leaves onto the roof.
Chemical Compatibility and What to Avoid
Rubber roofing is resilient, but it has limits when it comes to chemicals. Certain substances will degrade EPDM on contact, and knowing what to avoid is as important as knowing how to clean. Petroleum-based solvents, mineral spirits, and strong acidic or alkaline cleaners should never touch the membrane.
Bitumen-based products are a particular hazard. If bitumen or coal tar comes into contact with EPDM, it will cause the rubber to swell and break down (roofingcontractor.com). This is a common issue when a rubber roof is installed over an older felt roof that was not fully removed. Always check the label of any cleaning product for compatibility with EPDM before use.
Seasonal Schedule and When to Call a Professional
A simple seasonal maintenance schedule keeps your roof in good condition year-round. In spring, perform a full inspection after the worst of the winter weather and clear any debris that has accumulated. In autumn, clear leaves before the wet season begins and check that gutters are flowing freely.
The environmental impact of your maintenance choices also matters. Using mild, biodegradable detergents and avoiding harsh chemicals protects local waterways when the rinse water runs off. This approach is both better for the membrane and better for the environment.
While regular cleaning is a DIY job, some situations warrant a professional. If you notice persistent leaks, large areas of damage, or suspect the seams are failing, call a specialist rather than attempting a temporary fix. A professional installer like ARRC Ltd can assess the roof, carry out repairs correctly, and advise on whether a replacement is more cost-effective than ongoing patches. With over 30 years of experience and a 20-year guarantee on flat rubber roofs, we provide durable, long-lasting solutions across Staffordshire, Cheshire, and Stockport.
Frequently Asked Questions
How often should a rubber roof be inspected for damage?
Inspect your EPDM rubber roof at least twice a year, ideally in spring and autumn. A visual check after storms or heavy winds also helps catch minor issues early. Look for debris, ponding water, and signs of surface grime. This routine is the core of effective rubber roofing maintenance and prevents small problems from becoming costly repairs.
What are the most common signs of wear on EPDM roofing?
Look for surface grime, algae or moss growth, and debris accumulation. More serious signs include punctures, tears, or lifting at the seams. Check for water pooling that lasts more than a few days after rain, as this can accelerate UV degradation. Addressing these issues during your flat roof inspection checklist helps extend the lifespan of your EPDM roof.
Can I walk on my EPDM rubber roof for maintenance?
Yes, but with care. EPDM is durable, but concentrated pressure from heels or sharp tools can puncture it. Wear soft-soled shoes and spread your weight. Never walk on a wet or icy roof. Using a safety harness and proper ladder safety is essential for any work above ground level. If you are unsure, call a professional to handle the cleaning or inspection.
What should I do if I find a small puncture in my rubber roof?
Clean the area around the puncture with a mild detergent and rinse thoroughly. Dry it completely, then apply a patch from an EPDM roof repair kit. Use the correct primer and bonding adhesive as instructed. For tears larger than a few centimetres or damage near seams, call a professional to ensure the repair maintains the membrane's weatherproofing integrity.
Maintaining rubber roofing is not complicated, but it does require consistency and the right approach. By cleaning your roof twice a year, inspecting it for damage, and knowing when to call in a professional, you protect your property and extend the life of your roof significantly. For expert installation, repairs, or advice on EPDM rubber roofing, ARRC Ltd delivers high-quality workmanship backed by a 20-year guarantee. Get a quote today and ensure your flat roof is built to last.
This article was written using GrandRanker
Frequently Asked Questions
Q: How often should a rubber roof be inspected for damage?
A: Inspect your EPDM rubber roof at least twice a year, ideally in spring and autumn. A visual check after storms or heavy winds also helps catch minor issues early. Look for debris, ponding water, and signs of surface grime. This routine is the core of effective rubber roofing maintenance and prevents small problems from becoming costly repairs.
Q: What are the most common signs of wear on EPDM roofing?
A: Look for surface grime, algae or moss growth, and debris accumulation. More serious signs include punctures, tears, or lifting at the seams. Check for water pooling that lasts more than a few days after rain, as this can accelerate UV degradation. Addressing these issues during your flat roof inspection checklist helps extend the lifespan of your EPDM roof.
Q: Can I walk on my EPDM rubber roof for maintenance?
A: Yes, but with care. EPDM is durable, but concentrated pressure from heels or sharp tools can puncture it. Wear soft-soled shoes and spread your weight. Never walk on a wet or icy roof. Using a safety harness and proper ladder safety is essential for any work above ground level. If you are unsure, call a professional to handle the cleaning or inspection.
Q: What should I do if I find a small puncture in my rubber roof?
A: Clean the area around the puncture with a mild detergent and rinse thoroughly. Dry it completely, then apply a patch from an EPDM roof repair kit. Use the correct primer and bonding adhesive as instructed. For tears larger than a few centimetres or damage near seams, call a professional to ensure the repair maintains the membrane's weatherproofing integrity.