 how-to
Skylight Installation for Flat Roofs: A Step-by-Step Guide
Table of Contents
- Can You Install a Skylight on a Flat Roof?
- Flat Roof Skylight Planning Permission Requirements
- Types of Skylights Suitable for Flat Roofs
- What You'll Need Before Starting Installation
- Step-by-Step Skylight Installation Process
- How to Waterproof a Skylight Kerb Properly
- Cost of Flat Roof Skylight Installation
- Professional Installation vs. DIY: When to Call a Specialist
- Frequently Asked Questions
Last Updated: September 2, 2026
Can You Install a Skylight on a Flat Roof?
Yes, you can install a skylight on a flat roof. The key difference from pitched roofs is that flat roofs require specific waterproofing measures and structural considerations to prevent pooling water and leaks. A properly installed skylight can transform interior spaces with natural light while maintaining the roof's integrity. The difference between a skylight that lasts 20 years and one that leaks within two seasons comes down to three things: proper structural preparation, correct flashing installation, and meticulous weatherproofing.
Flat Roof Skylight Planning Permission Requirements
Before you drill a single hole in your roof, you need to understand the planning and building control requirements. In the UK, most skylight installations on flat roofs require Building Regulations approval, and many require planning permission depending on your circumstances.
According to Planning Portal guidance on permitted development, adding a skylight to an existing flat roof typically requires Building Regulations approval because you're creating a new opening in the building envelope. Planning permission is required if your property is listed, in a conservation area, or if the skylight would be visible from the street and significantly alter the building's appearance. For most standard residential properties, planning permission isn't needed for a single skylight, but Building Regulations approval is mandatory.
The Building Regulations process involves submitting plans showing the skylight's location, size, and how it meets thermal performance standards (typically a U-value of 1.4 W/m²K or better). Contact your local authority's Building Control department before purchasing materials. Failure to notify Building Control can result in enforcement action and difficulty selling your property later.
Types of Skylights Suitable for Flat Roofs
Not all skylights work equally well on flat roofs. The market offers several options, each with different structural, thermal, and maintenance characteristics.
Fixed and Opening Skylights
Fixed skylights are sealed units that don't open; they're purely for light and views. They're the most straightforward to install, require minimal maintenance, and offer the best weatherproofing because there are no moving parts or seals that degrade over time.
Opening skylights (also called roof windows or roof lights) feature hinged or sliding mechanisms that allow ventilation. These are valuable in kitchens, bathrooms, and bedrooms where moisture control matters. The trade-off is complexity: moving parts mean more potential failure points and higher maintenance. For flat roofs specifically, opening skylights need strong drainage channels built into the kerb to handle water that might pool during heavy rain.
Glazing Options: Double and Triple Glazing
Double glazing (two panes with an air gap) is the standard for most flat roof skylights and meets Building Regulations at around 1.4 W/m²K.
Triple glazing (three panes with two air gaps) offers superior thermal performance, reducing heat loss by approximately 20-30% compared to double glazing (peer-reviewed research). For residential flat roof installations, tempered glass with low-emissivity (low-E) coatings is the most common choice. Safety glass is a legal requirement in the UK for skylights and roof lights. Always verify that any skylight you purchase meets BS 6206 safety glass standards.
What You'll Need Before Starting Installation
Proper preparation prevents problems. Gather these materials and tools before beginning work.
Materials:
- The skylight unit itself (fixed or opening, with appropriate glazing)
- Installation kit (usually includes the kerb, flashing, and fixing brackets)
- EPDM membrane or compatible roofing material for your existing roof
- Structural glazing tape or sealant (typically polyurethane or silicone-based)
- Weatherproofing membrane (usually self-adhesive bituminous tape)
- Timber for upstand construction (pressure-treated softwood, typically 50mm × 50mm or 75mm × 75mm)
- Fixings: stainless steel bolts, brackets, and washers (galvanised steel will corrode and fail)
Tools:
- Circular saw or jigsaw for cutting the roof opening
- Drill with masonry bits for fixing brackets
- Tape measure and spirit level
- Utility knife for cutting membranes
- Caulking gun for applying sealant
- Ladder and roof access equipment
- Safety harness if working at height (mandatory for flat roofs above 2 metres)
Safety equipment:
- Hard hat and safety glasses
- Work gloves and knee pads
- Dust mask when cutting materials
- Fall protection harness and anchor points
The total material cost varies widely depending on the skylight size and glazing specification, but most installations require approximately £150-400 in fixings, sealants, and weatherproofing materials beyond the skylight unit itself. Budget for professional-grade materials; cheap sealants and brackets fail quickly on flat roofs.
Step-by-Step Skylight Installation Process
Step 1: Prepare the Roof Opening
Start by marking the opening location on the roof from inside the building. Use a drill with a long bit to create reference holes that you can see from above. The opening size should match your skylight's requirements exactly.
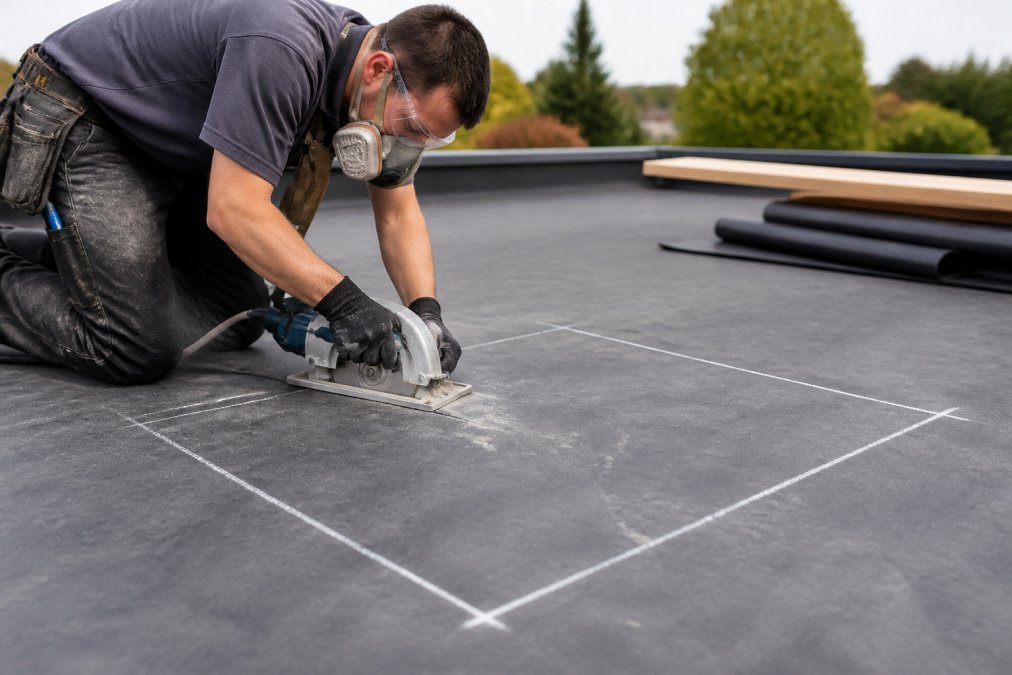
From the roof surface, mark the cutting line clearly using chalk or a marker. Cut through the existing roofing membrane (usually EPDM rubber or bitumen) and the structural deck beneath (typically plywood or concrete). Cut carefully along the marked line. Once the opening is cut, remove the membrane and any insulation carefully. Inspect the deck for damage and ensure it's structurally sound. If you find soft spots or rot in timber decking, the opening area must be reinforced or replaced before proceeding.
Step 2: Install the Upstand and Kerb
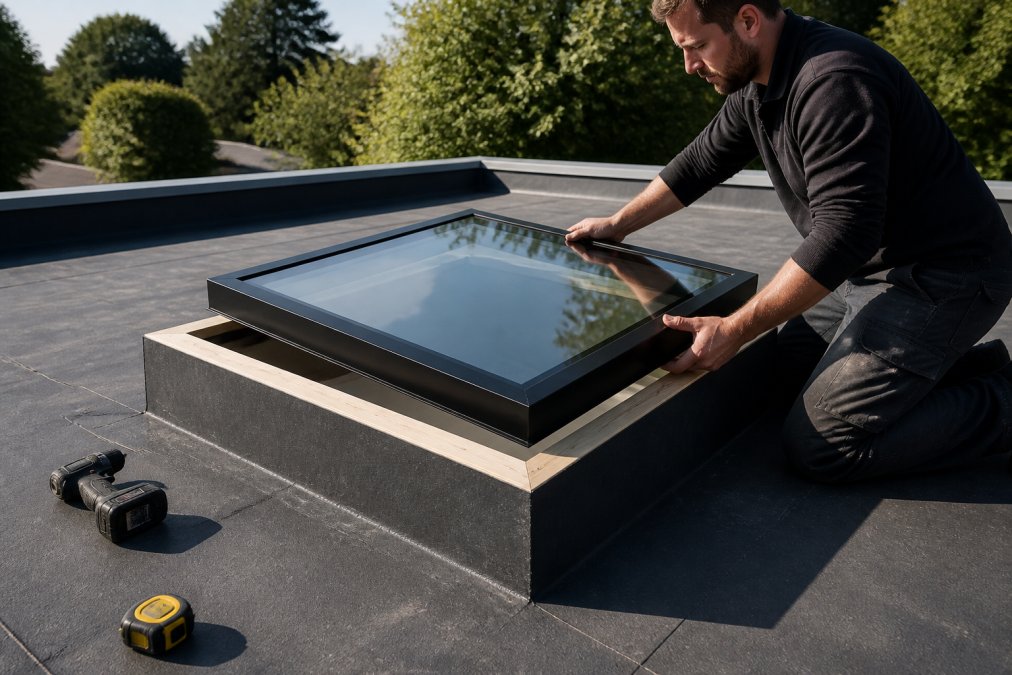
The upstand is the vertical wall you build around the roof opening. It raises the skylight above the flat roof surface, creating a barrier against water pooling. Most flat roof skylights require an upstand height of 150mm to 300mm.
Build the upstand using pressure-treated timber framing, bolted securely to the structural deck around the opening perimeter. The kerb sits on top of the upstand; most skylight installation kits include a pre-formed kerb made from aluminium or rigid plastic, which you bolt to the timber upstand. Ensure the kerb is level using a spirit level. Any slope should match your roof's designed drainage slope (typically 1:40 or 1:50).
Step 3: Apply Weatherproofing and Airtight Sealing
This step separates a skylight that lasts from one that leaks. Weatherproofing has two components: external waterproofing (stopping rain) and internal airtight sealing (preventing condensation and air leakage).
For external weatherproofing, apply a self-adhesive bituminous tape around the kerb's base where it meets the roof surface. Next, install flashing, typically an aluminium or lead sheet that extends over the upstand and overlaps the roof membrane on all sides. The flashing directs water down and away from the skylight opening. It should extend at least 100mm onto the roof surface and be secured with stainless steel fixings spaced every 150mm.
For internal airtight sealing, apply structural glazing tape or polyurethane sealant around the inside edge where the skylight frame meets the kerb. This tape compresses as the frame is secured, creating an airtight seal that prevents warm, moist air from inside the building from reaching the cold glazing surface (which causes condensation).
Step 4: Secure the Skylight Frame and Glazing
Once weatherproofing is in place, position the skylight unit on the kerb. Most units come with pre-drilled fixing holes. Align these holes with the kerb's fixing points and insert stainless steel bolts with washers and lock nuts. Tighten bolts evenly in a cross pattern to ensure even pressure.
Step 5: Test for Leaks and Condensation Control
Before declaring the installation complete, test the weatherproofing. On a dry day, use a hose to spray water around the skylight frame, paying particular attention to the corners and seams. Watch from inside the building for any water ingress. If water appears, identify the source and reseal that area immediately. Monitor the glazing surface for condensation over the next few weeks, especially during cold weather.
How to Waterproof a Skylight Kerb Properly
The kerb is the most critical waterproofing component on a flat roof skylight. It's the interface between the skylight frame and the roof surface, and it's where most leaks originate.
Proper kerb waterproofing involves three layers: the structural kerb itself, external flashing, and internal sealants. The kerb must be rigid and level; any flex or slope allows water to pool and find gaps in the sealant. The external flashing is your primary water barrier. It must overlap the roof membrane by at least 100mm and be secured with stainless steel fasteners spaced no more than 150mm apart. Lead flashing is the gold standard because it's malleable and self-seals around fasteners, but it's expensive. Aluminium flashing is more common and works well if installed correctly. Avoid galvanised steel flashing; it corrodes in the presence of EPDM rubber.
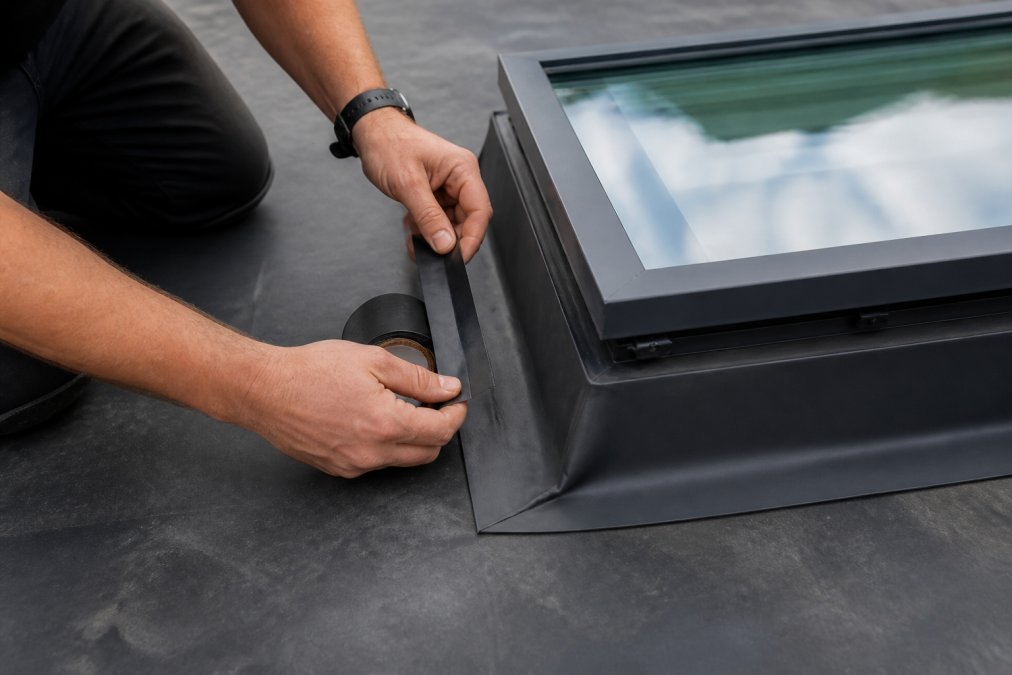
Seal all gaps between the flashing and the membrane with a polyurethane sealant rated for external use. On the inside, the airtight seal prevents warm, moist interior air from reaching the cold glazing. Apply structural glazing tape or low-modulus polyurethane sealant around the frame-to-kerb junction. This sealant must remain flexible as the materials expand and contract with temperature changes. Inspect the kerb seals annually, especially after winter, and reseal any damaged areas immediately.
Cost of Flat Roof Skylight Installation
The total cost of a flat roof skylight installation depends on several factors: the skylight size and glazing specification, your roof's structural condition, whether you're installing one or multiple units, and whether you're hiring professionals or attempting DIY installation.
Skylight units themselves range widely in price depending on size, glazing type, and opening mechanism. Installation materials, kerbs, flashing, sealants, and fixings typically add 20-30% to the skylight cost. Professional installation by an experienced roofer adds labour costs, but it includes proper Building Regulations compliance, warranty coverage, and insurance.
For current pricing, contact ARRC Ltd for a detailed quote. Our team can assess your specific situation, confirm Building Regulations requirements, and provide an accurate cost estimate based on your roof type, skylight specification, and installation complexity.
Professional Installation vs. DIY: When to Call a Specialist
DIY skylight installation is possible if you're experienced with roofing work, understand Building Regulations, and have proper safety equipment. However, most homeowners should hire a professional.
The skills required include cutting a precise roof opening, building a structurally sound upstand, installing flashing correctly, and applying weatherproofing sealants properly. Each step has failure modes that aren't obvious until water starts appearing inside your building months later. Professional installers also handle Building Regulations approval, which is mandatory. If you install a skylight without Building Regulations approval and later sell your property, the buyer's surveyor will flag it as non-compliant.
Safety is another factor. Working at height on a flat roof requires proper fall protection and equipment. ARRC Ltd installs skylights on flat roofs across residential and commercial properties. Our team handles all aspects: structural assessment, Building Regulations compliance, installation, and weatherproofing. We back every installation with our 20-year guarantee, which covers material failure and workmanship.
Skylight installation on a flat roof is achievable but demands precision in every step, from the initial opening through final weatherproofing. Get a quote from ARRC Ltd today and discover how a properly installed skylight can add genuine value to your property while eliminating the risk of water damage or condensation problems.
Frequently Asked Questions
Q: Do I need planning permission for a skylight on a flat roof?
A: Most residential skylights qualify as permitted development under Building Regulations, meaning you don't need planning permission if the installation doesn't increase the roof's height and meets safety standards. However, you must notify your local building control authority before work begins. Listed buildings and conservation areas have stricter rules. Always check with your local authority first, as requirements vary by location.
Q: How much does skylight installation for a flat roof cost?
A: The cost of flat roof skylight installation depends on the skylight size, glazing type (double or triple glazing), materials, and whether structural work is needed. Pricing also varies based on roof condition, EPDM membrane compatibility, and labour complexity. For current pricing and a personalised quote tailored to your project, contact ARRC Ltd directly, they can assess your specific requirements and provide an accurate estimate.
Q: What's the best way to waterproof a skylight kerb?
A: Proper waterproofing requires a multi-layer approach: install an upstand (kerb) to elevate the skylight above the roof surface, apply structural glazing tape around the frame, seal all joints with weatherproofing sealant, and ensure the EPDM membrane or roofing material is correctly flashed around the kerb. The flashing must overlap the membrane to direct water away. Regular inspection for separation or cracking prevents leaks before they develop.
Q: Can you retrofit a skylight into an existing flat roof?
A: Yes, retrofitting a skylight into an existing flat roof is possible, but it requires careful assessment of structural integrity and roof condition. The roof opening must be properly framed to maintain structural strength. If your roof has existing pooling water or damage, these issues should be addressed first. Professional installers can evaluate whether your roof can support a skylight and whether EPDM or other roofing materials need reinforcement around the opening.
This article was written using GrandRanker