 how-to
5 Steps to Install Solar Panels on Commercial EPDM Roofs
Last Updated: October 30, 2026
Quick Summary
Solar panels on commercial EPDM roofs are possible when the roof can carry the load, the membrane is in good condition, and the building meets current rules. Check structural capacity, membrane condition and the manufacturer's approved mounting method before ordering any panels.
- Check the membrane for splits, blisters, failed seams and ponding before installing.
- Have a structural engineer confirm the deck can carry panels, ballast, snow and wind uplift.
- Reroof first if the membrane is near the end of its service life.
- Get the EPDM manufacturer's written approval of the mounting method to protect the guarantee.
- Schedule a membrane inspection at least once a year and after severe storms.
Table of Contents
- Checking Whether Your Commercial EPDM Roof Can Take Solar Panels
- EPDM Roof Structural Assessment for Solar Panels
- Choosing a Solar Panel Mounting System for Flat Roofs
- Step-by-Step Installation Sequence on an EPDM Membrane
- Protecting Your EPDM Roof Warranty During Solar Installation
- Maintaining an EPDM Roof With Solar Panels Installed
- Booking a Survey Before You Commit to Solar on Your EPDM Roof
- Frequently Asked Questions
Installing solar panels on commercial EPDM roofs is possible, but only if the roof can carry the load, the membrane is in good condition, and the building meets current rules. Many commercial owners assume a flat rubber roof is automatically suitable. It often is not. A short check before you order any panels can save you from a leak, a voided guarantee, or a costly reroof later.
Checking Whether Your Commercial EPDM Roof Can Take Solar Panels
Start with a visual and documented check of the existing covering. Look for splits, blisters, exposed fixings, failed seams, and areas of ponding water. Ponding is a warning sign because it adds weight and speeds up membrane wear.
A common mistake is treating solar as a separate project from the roof. In practice, the roof has to carry the panels, the mounting system, and any ballast for the next 25 years or more.
Roof condition and remaining service life
Ask a qualified roofer to confirm how much life the membrane has left. If the roof needs replacing soon, it is generally sensible to reroof first and install solar afterwards, as lifting and refitting an array later can add cost and risk damage to the membrane.
- Check the age and records of the existing EPDM covering
- Look for ponding, seam failure, and UV cracking
- Confirm the membrane's past repairs and any remaining manufacturer guarantee
Fire, electrical and building-control requirements
Commercial solar work in the United Kingdom has to meet building regulations and relevant electrical standards. Check with your local building control body before work starts, because requirements depend on the building type and its height (Building regulations approval: When you need approval).
Ask your installer for their insurance details and confirmation that they are competent to work on membrane roofs. Keep copies of every certificate with your property records.
EPDM Roof Structural Assessment for Solar Panels
Panels add weight, and on a flat roof that weight sits on the building structure. A structural engineer should confirm that the deck and supporting beams can carry the dead load of the panels plus ballast, along with snow and wind loads for your location. For background on installing on commercial membranes, see the commercial EPDM installation guide for the full process.
Breaking down the loads
A proper assessment for a commercial EPDM roof should itemise at least four load cases:
- Dead load. The permanent weight of the modules, mounting rails, ballast blocks, and any cable trays or inverters mounted on the roof. Ballasted systems are the heaviest, so the ballast quantity drives the dead load.
- Snow load. The snow load for the site, taken from the relevant British Standard and adjusted for roof pitch, altitude, and exposure. Panels can trap snow at the low edge of an array, so the engineer should consider drift and accumulation between rows.
- Wind uplift. Wind does not just push down, it pulls up on the array and on the membrane. The uplift figure depends on the wind zone, the building height, the roof edge and corner zones, and the array's tilt and spacing. Uplift often governs the ballast quantity, not the dead load.
Ask the engineer to present these as a load case table with the existing roof's capacity alongside. If the spare capacity is marginal, the engineer may recommend a lighter mounting method, reduced ballast, or a structural upgrade before any panels are ordered.
What the engineer needs from you
To do the calculation properly, the engineer will need the roof construction drawings, the deck type and span, the purlin or beam sizes, and the membrane build-up. If drawings are missing, a site investigation may be needed. Provide the proposed array layout, the mounting method, and the ballast specification so the loads are realistic rather than generic.
Existing roof condition and penetrations
The structural check should also cover the membrane's condition and any existing penetrations or rooftop plant. Proactive measures for preventing roof leaks are essential when mounting hardware, as the integrity of the EPDM surface remains the primary defense against water intrusion throughout the lifespan of the system.
Get the load calculation and the membrane condition report in writing before you commit. That document is what your installer, your insurer, and the membrane manufacturer will want to see if anything goes wrong.
Choosing a Solar Panel Mounting System for Flat Roofs
The mounting method affects the membrane, the loading, and how easily you can maintain the roof later. There is no single best option. The right choice depends on the roof's strength, its condition, and the wind exposure at your site.
Ballasted systems
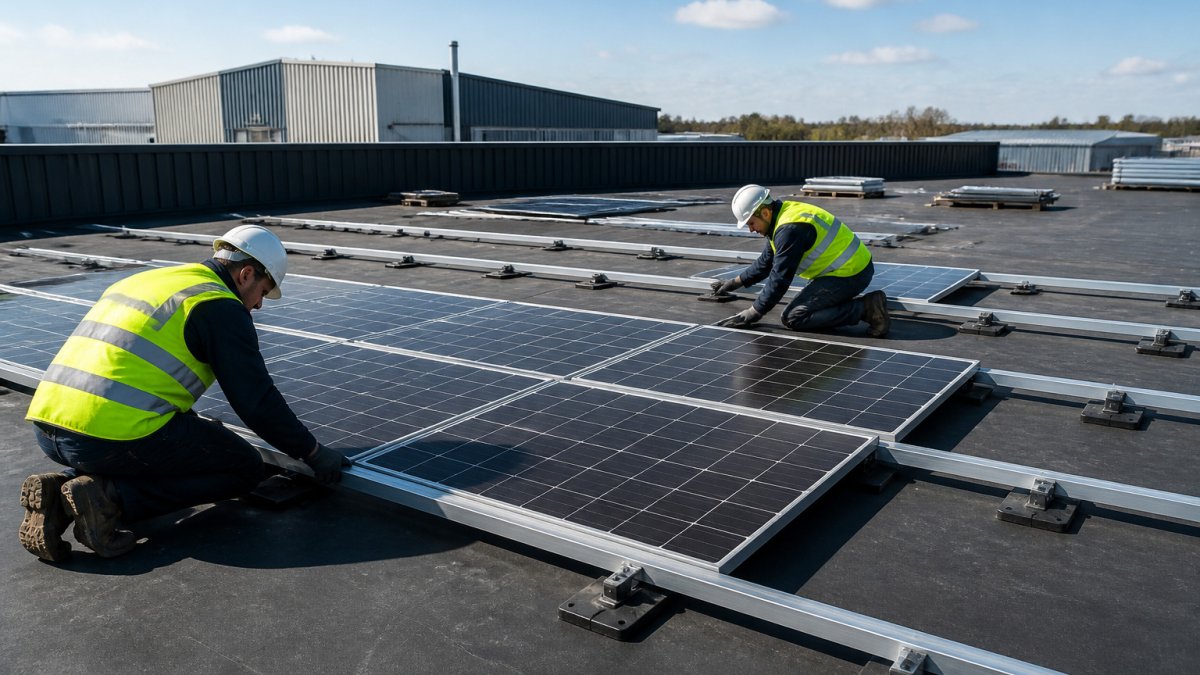
Ballasted systems rest on the roof and use weights, usually concrete blocks or paving, to hold the frame down. They avoid drilling into the membrane, which protects the waterproofing and can keep the guarantee intact. The trade-off is weight, so the structure must have spare capacity.
Mechanically fixed and bonded systems
Mechanically fixed systems use screws or clamps that pass through the membrane into the deck or a fixing plate. Bonded systems use adhesive to attach the mounts to the membrane. Both reduce the ballast needed, but each creates points where the waterproofing must be properly sealed.
Ask the EPDM manufacturer which fixing methods they approve. Using a method they do not accept can affect the membrane guarantee, even if the install looks solid.
Step-by-Step Installation Sequence on an EPDM Membrane
Work through this sequence with your installer. Each stage protects the membrane and makes the next one safer.
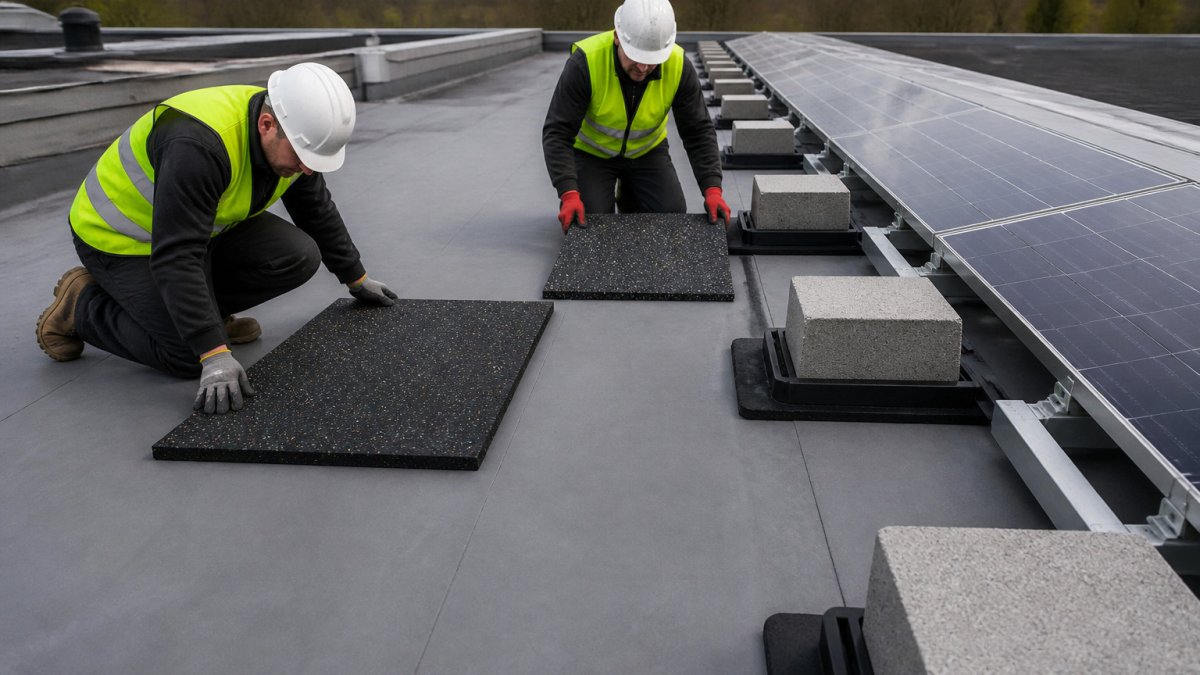
- Survey and sign-off. Confirm the roof condition, structural capacity, and the mounting method in writing.
- Protect the membrane. Lay protective pads or sheets where people walk, where ballast will sit, and where tools will rest.
- Set out the layout. Mark the array positions so the mounts and walkways avoid penetrations and drainage outlets.
- Fix or position the mounts. Install ballast or fixings using the approved method, sealing any penetrations to manufacturer specification.
- Install panels and wiring. Fit the modules, route cables away from the membrane, and carry out electrical testing and certification.
Watch out: dropping tools or dragging ballast across the membrane is a common cause of punctures that only show up months later.
The installation sequence runs in five stages, and each one protects the membrane for the next.
| Step | What to do | Key point |
|---|---|---|
| 1. Survey and sign-off | Confirm roof condition, structural capacity and mounting method in writing | Agree everything before work starts |
| 2. Protect the membrane | Lay protective pads or sheets where people walk, ballast sits and tools rest | Prevents punctures |
| 3. Set out the layout | Mark array positions clear of penetrations and drainage outlets | Keeps drainage and walkways open |
| 4. Fix or position mounts | Install ballast or fixings using the approved method and seal penetrations | Follow manufacturer specification |
| 5. Install panels and wiring | Fit modules, route cables away from membrane, test and certify electrics | Certification completes the install |
Protecting Your EPDM Roof Warranty During Solar Installation
Your membrane guarantee can depend on how the work is done and who does it. Before installation starts, obtain written confirmation from the EPDM manufacturer or your roofing contractor that the chosen mounting method and installer are acceptable under the guarantee.
What typically voids an EPDM membrane guarantee
Most EPDM manufacturers set conditions around the following, and a solar installation can breach any of them:
- Unapproved adhesives or sealants. Bonded mounts rely on adhesive, and using a product the membrane manufacturer has not tested can affect the membrane's performance and the guarantee.
- Unapproved fixings or penetration methods. Mechanical fixings that pass through the membrane must use the manufacturer's approved plates, seals, and sealing method. A generic screw and mastic detail is often not acceptable.
- Ballast that damages the membrane. Ballast blocks laid directly on the membrane, or ballast that moves and abrades the surface, can be excluded. Protective pads or a separation layer are often required.
A practical warranty checklist
Work through this list with your solar installer and roofing contractor before work starts:
- Identify the membrane manufacturer and guarantee terms. Ask for the current guarantee document, not a summary.
- Confirm the mounting method is approved. Get written confirmation that the ballasted, bonded, or mechanically fixed system is acceptable.
- Confirm the adhesives and sealants. Check that every product used on the membrane is on the manufacturer's approved list.
- Confirm the installer's status. Ask whether the membrane work must be done by an approved contractor and whether your solar installer qualifies.
- Agree the penetration details. Obtain the manufacturer's standard detail drawings for any fixing that passes through the membrane.
- Record the pre-install condition. Photograph the membrane, note existing defects, and have the roofer sign off the condition before work starts.
- Keep the post-install record. Photograph every penetration, seal, and ballast layout, and file the electrical certificates with the guarantee documents.
Who carries the risk if something goes wrong
If a leak appears after installation, the guarantee position decides who pays. A membrane guarantee that has been voided by unapproved work may leave you covering the repair yourself. Agree in the contract which party is responsible for membrane damage during installation, and make sure your solar installer's insurance covers work on membrane roofs. To understand exactly what warranty coverage applies, read EPDM roofing guarantee coverage explained.
Maintaining an EPDM Roof With Solar Panels Installed
Solar panels make the roof harder to inspect, so plan access from the start. Keep clear walkways, and make sure drains and outlets are not blocked by panels or ballast.
Schedule an inspection at least once a year and after severe storms. To see how long the membrane is likely to last under panels, read the EPDM roofing lifespan guide. For practical upkeep steps, see how to maintain rubber roofing.
When panels need removing for a repair or reroof, use an installer who knows how to lift and store them safely without damaging the membrane.
Booking a Survey Before You Commit to Solar on Your EPDM Roof
Before you commit, arrange a site survey to check the roof's condition, the structure, and the right mounting method. Ask for a written report that covers the membrane's remaining life, the load assessment, and the guarantee position.
Contact ARRC Ltd to arrange a survey. The team can advise whether your roof is ready for solar or needs attention first.
Frequently Asked Questions
Can you put solar panels on an EPDM roof?
Yes, solar panels can be installed on an EPDM roof, provided the roof is structurally sound, in good condition and has enough remaining service life to justify the work. Installers typically use ballasted, mechanically fixed or bonded mounting systems, each chosen to suit the roof's load capacity and the membrane's condition. Before any work begins, the roof should be surveyed by a qualified engineer, and the EPDM manufacturer's guidance on compatible fixings and warranty conditions should be checked. Getting these details right at the start prevents costly problems later.
Can solar panels be installed on an EPDM roof without penetrating the membrane?
Yes. Ballasted systems sit on the membrane and rely on weight, usually concrete blocks or paving, to hold the frame in place, so no penetrations are needed. This approach suits roofs with enough structural capacity to carry the added load. Bonded systems can also avoid penetrations by adhering to the membrane, but the adhesive and surface preparation must be approved by the membrane manufacturer. Whichever method is used, the structural assessment should confirm the roof can carry the loads involved.
What checks should be carried out before installing solar panels on an EPDM roof?
A competent assessor should check the roof's structural capacity, the age and condition of the membrane, the presence of existing leaks or ponding, and the remaining service life. You should also confirm fire, electrical and building-control requirements, and review the EPDM manufacturer's warranty terms. Where the roof is nearing the end of its life, carrying out reroofing before the panels go on is usually more economical than removing and refitting the array later. Pricing depends on roof size, access and the system chosen, so check ARRC Ltd's website for current prices or a quote.
How can solar panel installation affect an EPDM roof warranty?
Installation can affect warranty cover if the work does not follow the membrane manufacturer's approved methods, such as using non-approved adhesives, fixings or walkway protection. Warranties may also be voided by unauthorised penetrations or damage caused during installation. Ask the installer to confirm in writing that the system is compatible with your membrane and that the manufacturer has been notified. Details of any guarantee should be confirmed with the installer and the membrane manufacturer before work starts.