 how-to
How to Properly Seal EPDM Roof Seams: Step-by-Step
Table of Contents
- What You'll Need Before You Seal EPDM Seams
- Getting the EPDM Roof Seam Overlap Right
- Step 1: Clean and Prepare the Seam
- Step 2: EPDM Seam Tape Installation
- Step 3: Applying EPDM Roof Seam Adhesive
- How to Repair a Separating EPDM Seam
- Common Mistakes to Avoid When You Seal EPDM Seams
- Conclusion
- Frequently Asked Questions
Last Updated: October 18, 2026
What You'll Need Before You Seal EPDM Seams
Knowing how to properly seal EPDM roof seams comes down to three things: clean rubber, the right tape, and a contact adhesive applied to both surfaces. Get those right and the seam will outlast the membrane itself. Get them wrong and you'll be back on the roof within a season.
At ARRC Ltd, we've spent over 30 years installing and repairing flat rubber roofs, and we've seen more seam failures than any other single fault. Nearly all of them trace back to prep, not materials.
Here's what you need before you start:
- EPDM seam tape (uncured rubber tape, not general-purpose tape)
- EPDM contact adhesive and a short-nap roller
- A solvent-based seam cleaner
- A hard-handled seam roller
- Sharp scissors or a seam knife
- Chalk line and tape measure
EPDM, or ethylene propylene diene monomer, is a synthetic rubber membrane used on flat roofs because it resists UV, ozone and temperature swings. Seams are its weak point, so they need proper treatment.
Getting the EPDM Roof Seam Overlap Right
Correct EPDM roof seam overlap is 75mm minimum, with 100mm preferred for exposed or high-wind areas. The overlap must be uniform along its full length, or the tape won't sit flat.
Measure and mark with a chalk line before you lay anything. A wavy overlap is the most common cause of a seam that looks fine on day one and peels by winter.
- Check the overlap runs parallel along the whole seam
- Keep the upper sheet on the downslope side where possible
- Allow extra overlap at corners and upstands
If you're installing new membrane rather than repairing, sort the overlap before you commit to adhesive. Moving a sheet after the tape has grabbed is not worth the effort.
Step 1: Clean and Prepare the Seam
Clean, dry rubber is the whole game. Wipe both surfaces of the overlap with an EPDM seam cleaner and let them dry fully before anything else touches them.
Dirt, chalk dust and moisture all stop the tape from bonding. A common mistake is cleaning on a damp morning and pressing ahead anyway. If the membrane feels cool and clammy, wait.
- Wipe the full overlap width on both sheets
- Change cloths as they pick up dirt
- Let the surface dry completely, not just look dry
- Never use washing-up liquid or general solvents
Check the weather too. Seam work needs a dry day with no rain forecast for several hours, and adhesive doesn't behave well in the cold.
Step 2: EPDM Seam Tape Installation
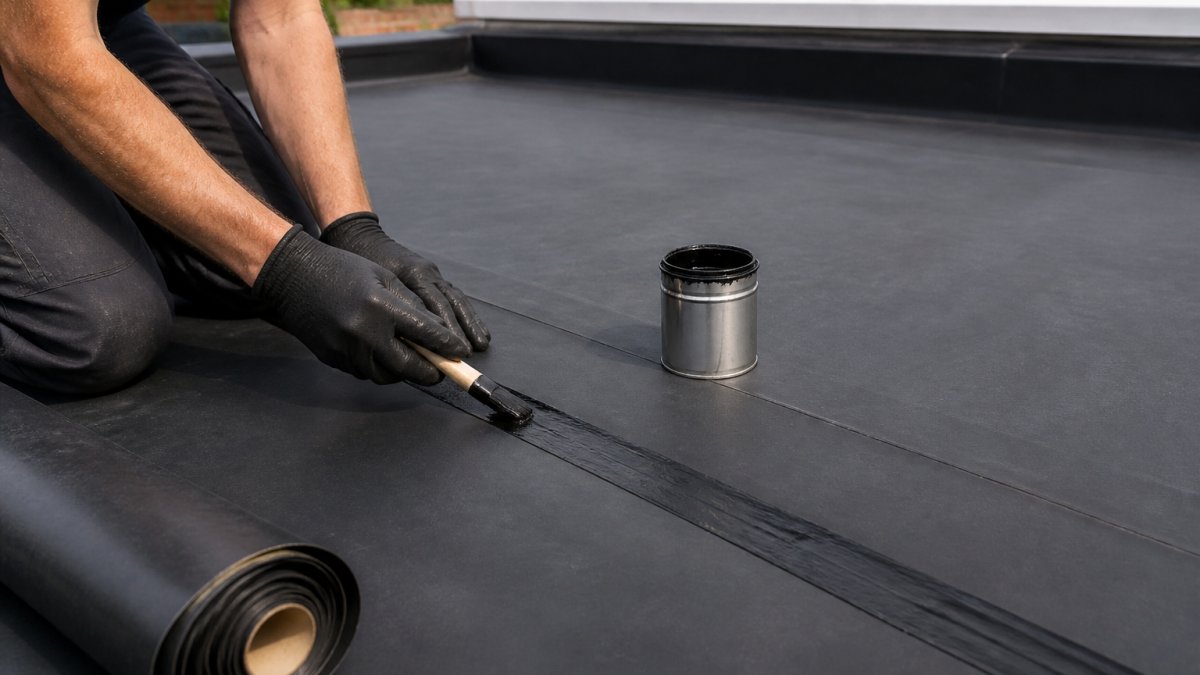
EPDM seam tape installation is straightforward once the surfaces are clean: peel the backing, press the tape along the overlap, then roll it hard.
Lay the tape centred on the overlap line. Leave the release paper on until you're ready to press, and work in sections of a metre or so rather than unrolling the whole length at once.
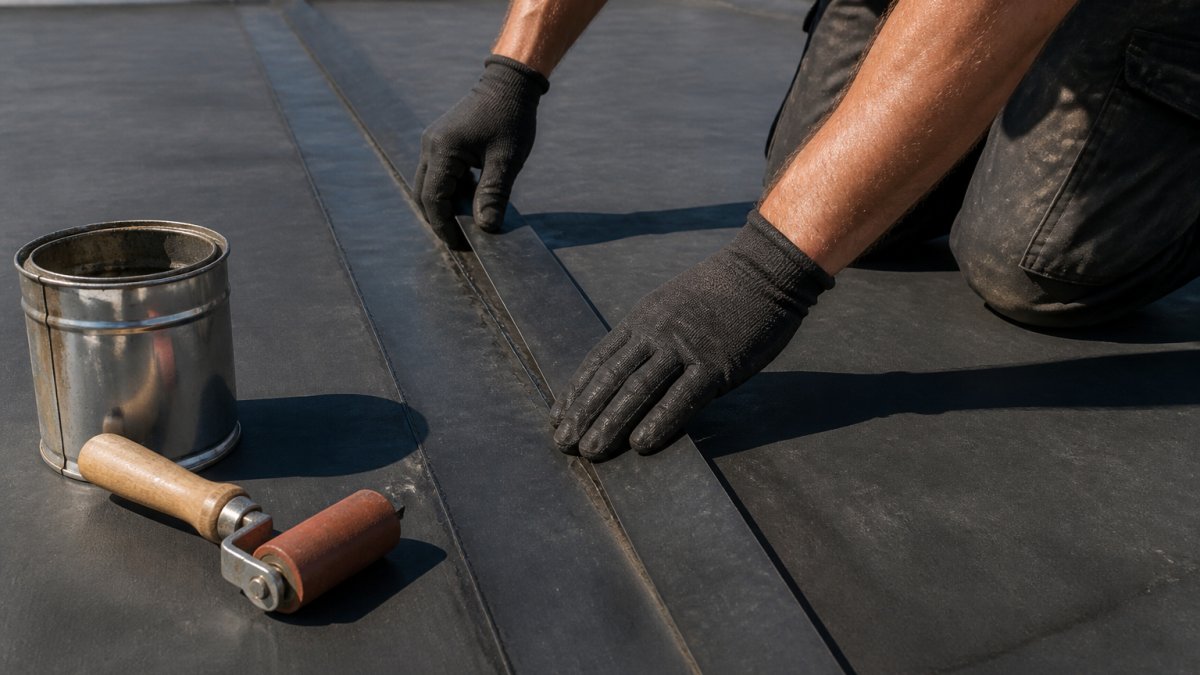
- Position the tape, then peel the backing as you go
- Press down firmly by hand first
- Roll the full width with a seam roller, working outwards
- Overlap tape ends by at least 25mm where runs meet
Rolling matters more than people expect. Hand pressure alone leaves air pockets, and air pockets become lifts.
Step 3: Applying EPDM Roof Seam Adhesive
EPDM roof seam adhesive is a contact adhesive: you apply it to both surfaces, let it flash off, then press them together. It is not a gap filler.
Apply a thin, even coat to the tape face and the membrane it will bond to. Let both coats go tacky, usually a few minutes, then press and roll. Thick coats trap solvent and weaken the bond.
- Use a short-nap roller for an even film
- Don't puddle adhesive at corners
- Press from the centre outwards to push air ahead of the bond
- Roll the finished seam again once pressed
Temperature affects open time. On a warm day the adhesive flashes faster, so work smaller sections. On a cold day it stays wet longer, so give it more time before pressing.
How to Repair a Separating EPDM Seam
To repair a separating EPDM seam, lift the loose edge, clean out any trapped dirt or old adhesive, then re-bond with fresh seam tape and adhesive. Don't just glue the lifted edge back down.
Work the seam open gently with a blunt tool. Clean the full area that will be re-bonded, not just the visible gap. If the tape itself has failed, cut it out and start fresh.
- Lift and inspect the full failed length
- Remove loose tape and any contaminated adhesive
- Clean and dry both surfaces
- Re-tape and re-bond as you would a new seam
- Roll thoroughly and check the edges
If the membrane under the seam is torn or perished, tape alone won't fix it. That's a patch or a replacement, and it's worth getting an experienced eye on it.
Common Mistakes to Avoid When You Seal EPDM Seams
Most seam failures come from five repeatable mistakes, and all of them are avoidable.
- Skipping the cleaner. Tape won't stick to dust or chalk.
- Working on a damp surface. Moisture under the tape turns into a lift.
- Using the wrong adhesive. Bitumen and silicone don't bond to EPDM.
- Not rolling the seam. Hand pressure leaves air pockets behind.
- Rushing the flash-off time. Pressing wet adhesive gives a weak bond.
The other one is weather. Seam work in the cold or in a drizzle is a false economy, and it's the reason so many DIY repairs fail by the following spring.
If your roof has had two or three failed repairs in the same place, the seam isn't the real problem. It's worth having the whole flat roof looked at properly.
Conclusion
Knowing how to properly seal EPDM roof seams isn't complicated, but it is unforgiving of shortcuts. Clean surfaces, the right tape, EPDM-specific adhesive and a proper roller will get you a seam that lasts as long as the membrane.
If you'd rather not tackle it yourself, or you've had repairs fail before, ARRC Ltd can help. We bring over 30 years of flat roofing experience, high-quality EPDM materials, and a 20-year guarantee on our flat rubber roofs. We also handle fascias, soffits and guttering in the same visit, so you're not coordinating several trades.
Get a quote from ARRC Ltd and have your roof sealed properly, first time.
Frequently Asked Questions
How do you seal seams on an EPDM roof?
Clean the overlap with a suitable primer, then apply EPDM seam tape or a dedicated seam adhesive along the join and press it down firmly with a roller. The overlap should be at least 75mm wide and both surfaces must be dry and free of dirt, chalk or old adhesive. A properly sealed seam bonds to the membrane itself rather than sitting on top of it, which is what keeps water out over the long term.
What is the correct overlap for EPDM roofing seams?
A minimum overlap of 75mm is the usual starting point, though many installers work to 100mm on exposed or low-slope areas where water can pool. The overlap needs to be consistent along its full length, with no ripples or trapped air. If the EPDM roof seam overlap is too narrow, the tape or adhesive has less material to bond to, and the join is far more likely to lift after a few seasons of freeze-thaw.
Can you repair an EPDM seam that is separating?
Yes. Lift the separated edge, clean both surfaces thoroughly and remove any old adhesive residue, then prime and re-bond with seam tape or adhesive. If the membrane itself is torn or stretched, cut back to sound material and fit a cover patch that extends at least 50mm beyond the damage on every side. Repairing a separating EPDM seam early is far cheaper than replacing the section once water has tracked underneath.
How long does EPDM seam adhesive take to cure?
Most EPDM contact adhesives need 10 to 30 minutes of tack time before you join the surfaces, then a few hours to reach a handling strength. Full cure typically takes 24 hours, so avoid walking on the seam or letting it get wet during that window. Cold or damp weather slows curing considerably, which is why seams are best sealed in dry conditions above 5°C.